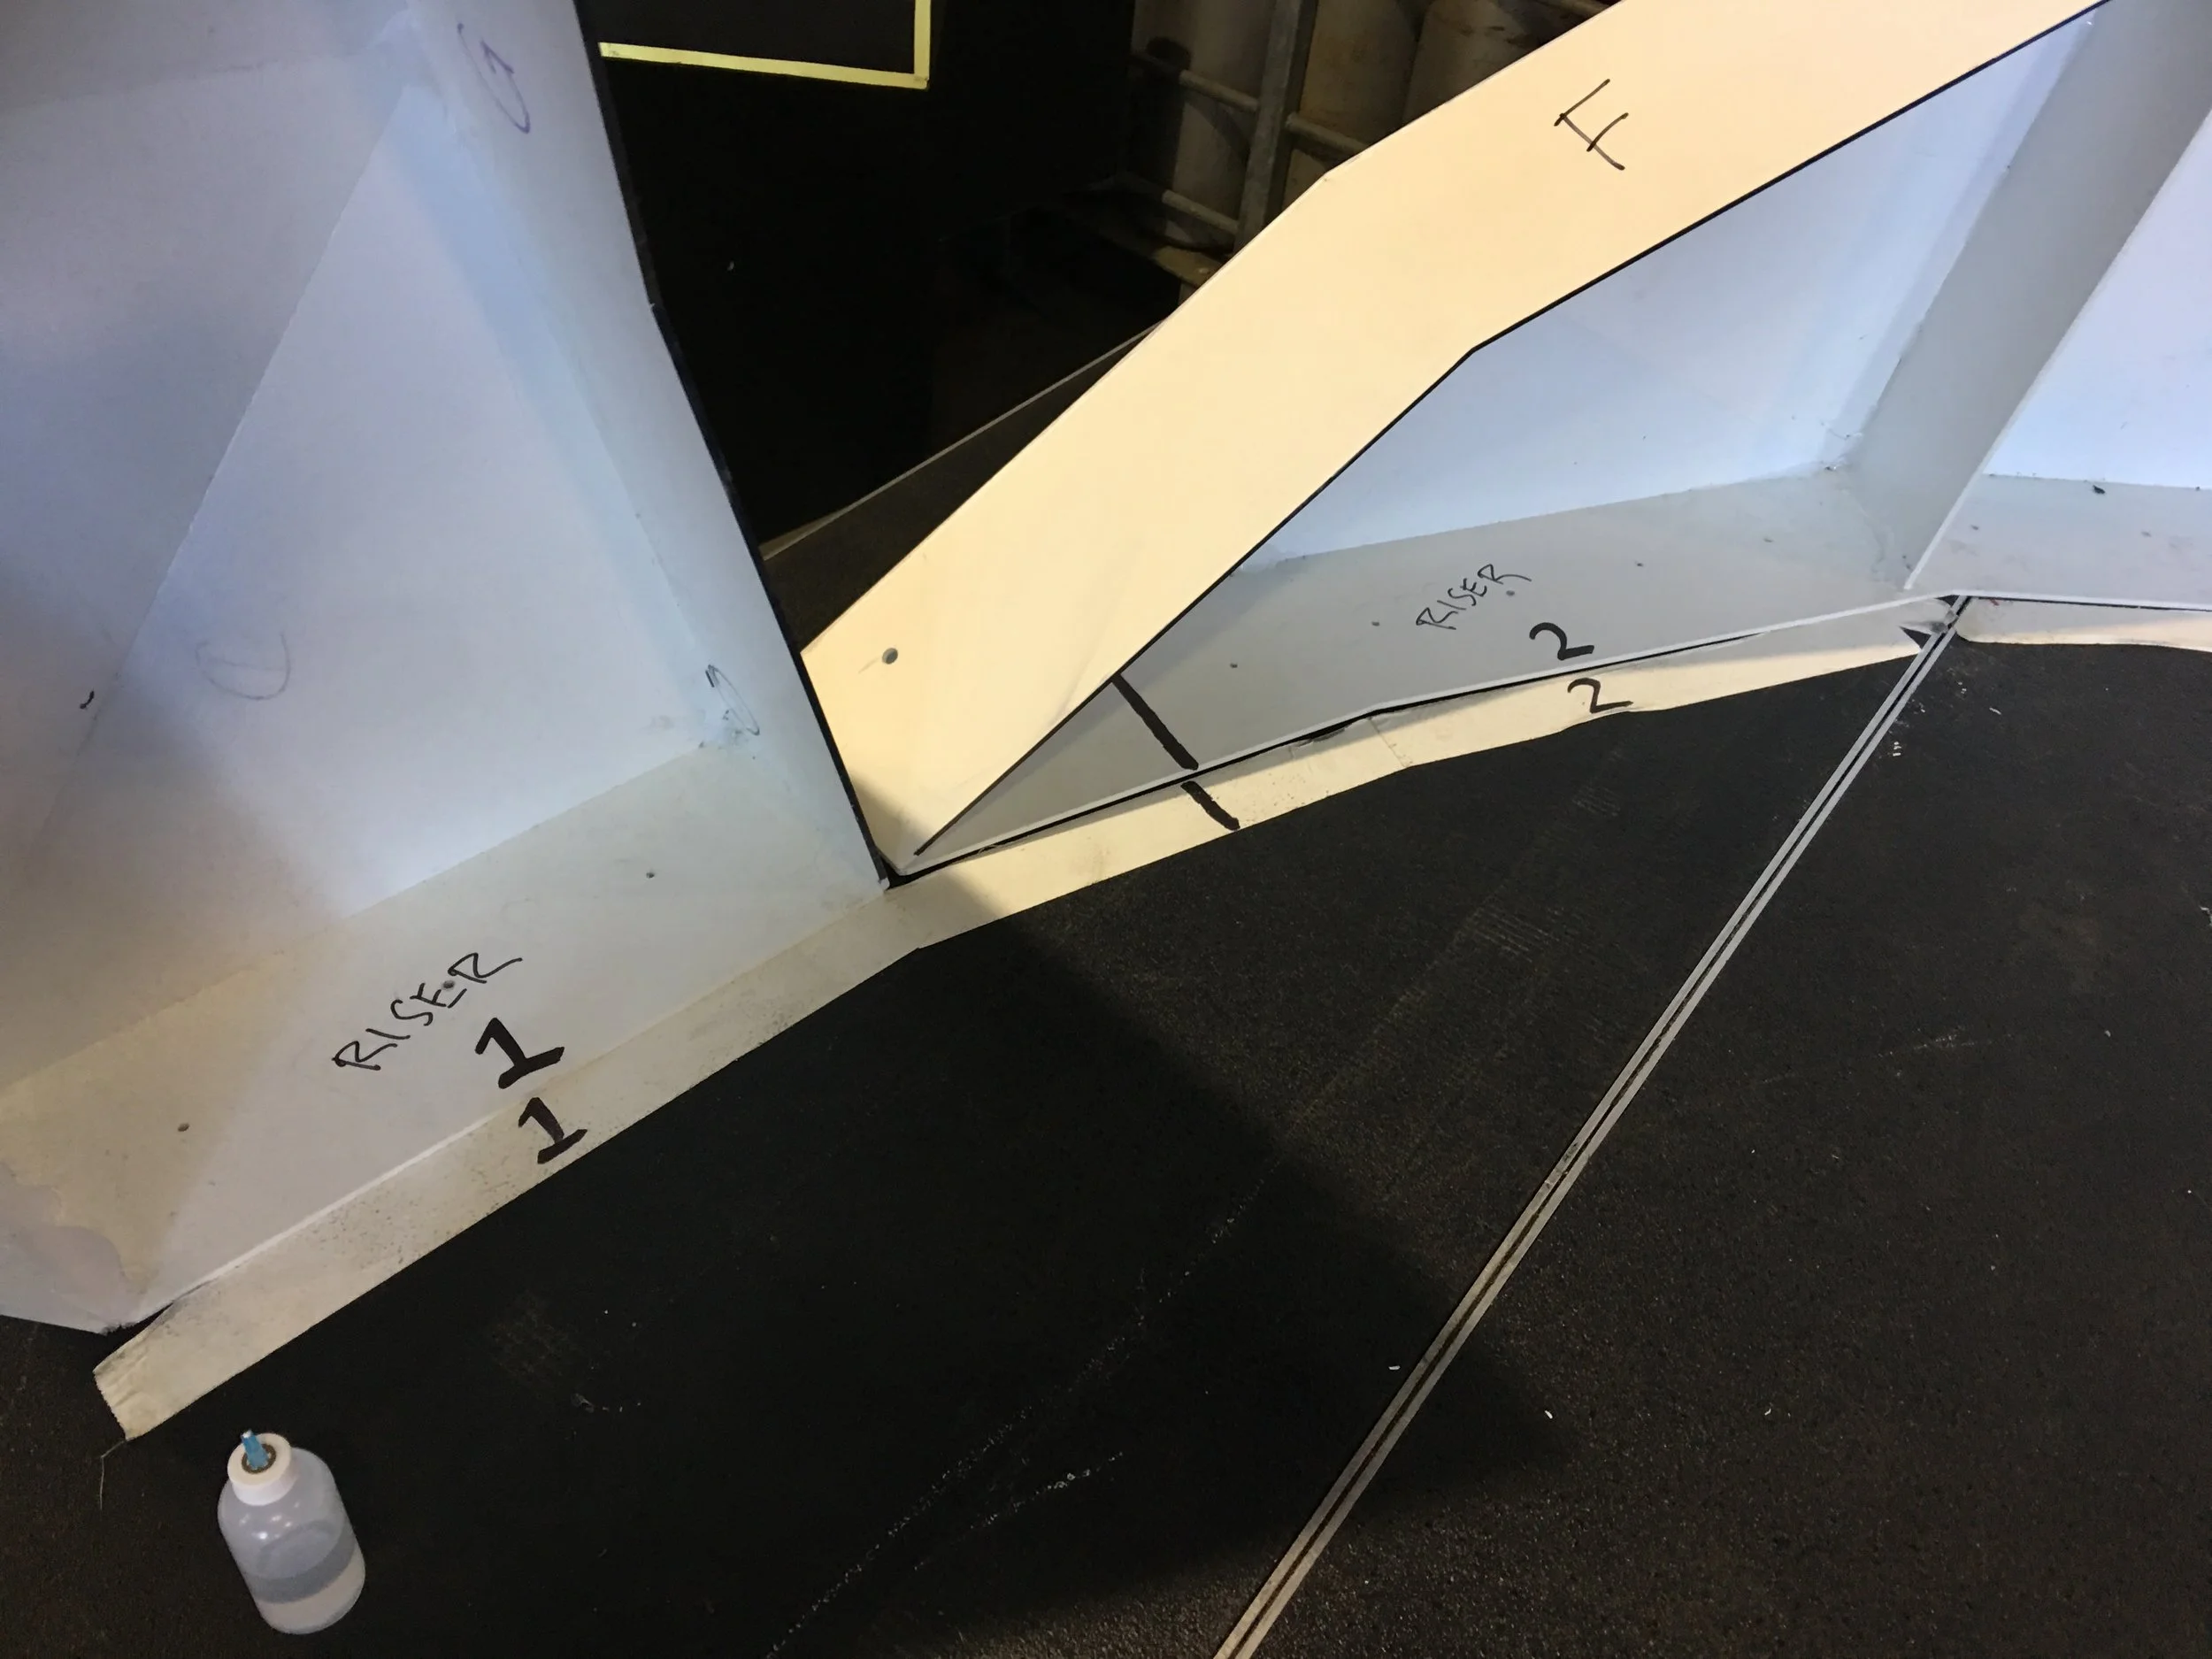
After assembling individual risers, attach each small riser to its corresponding large riser with two C clamps. The white tape on the risers should form an arc.
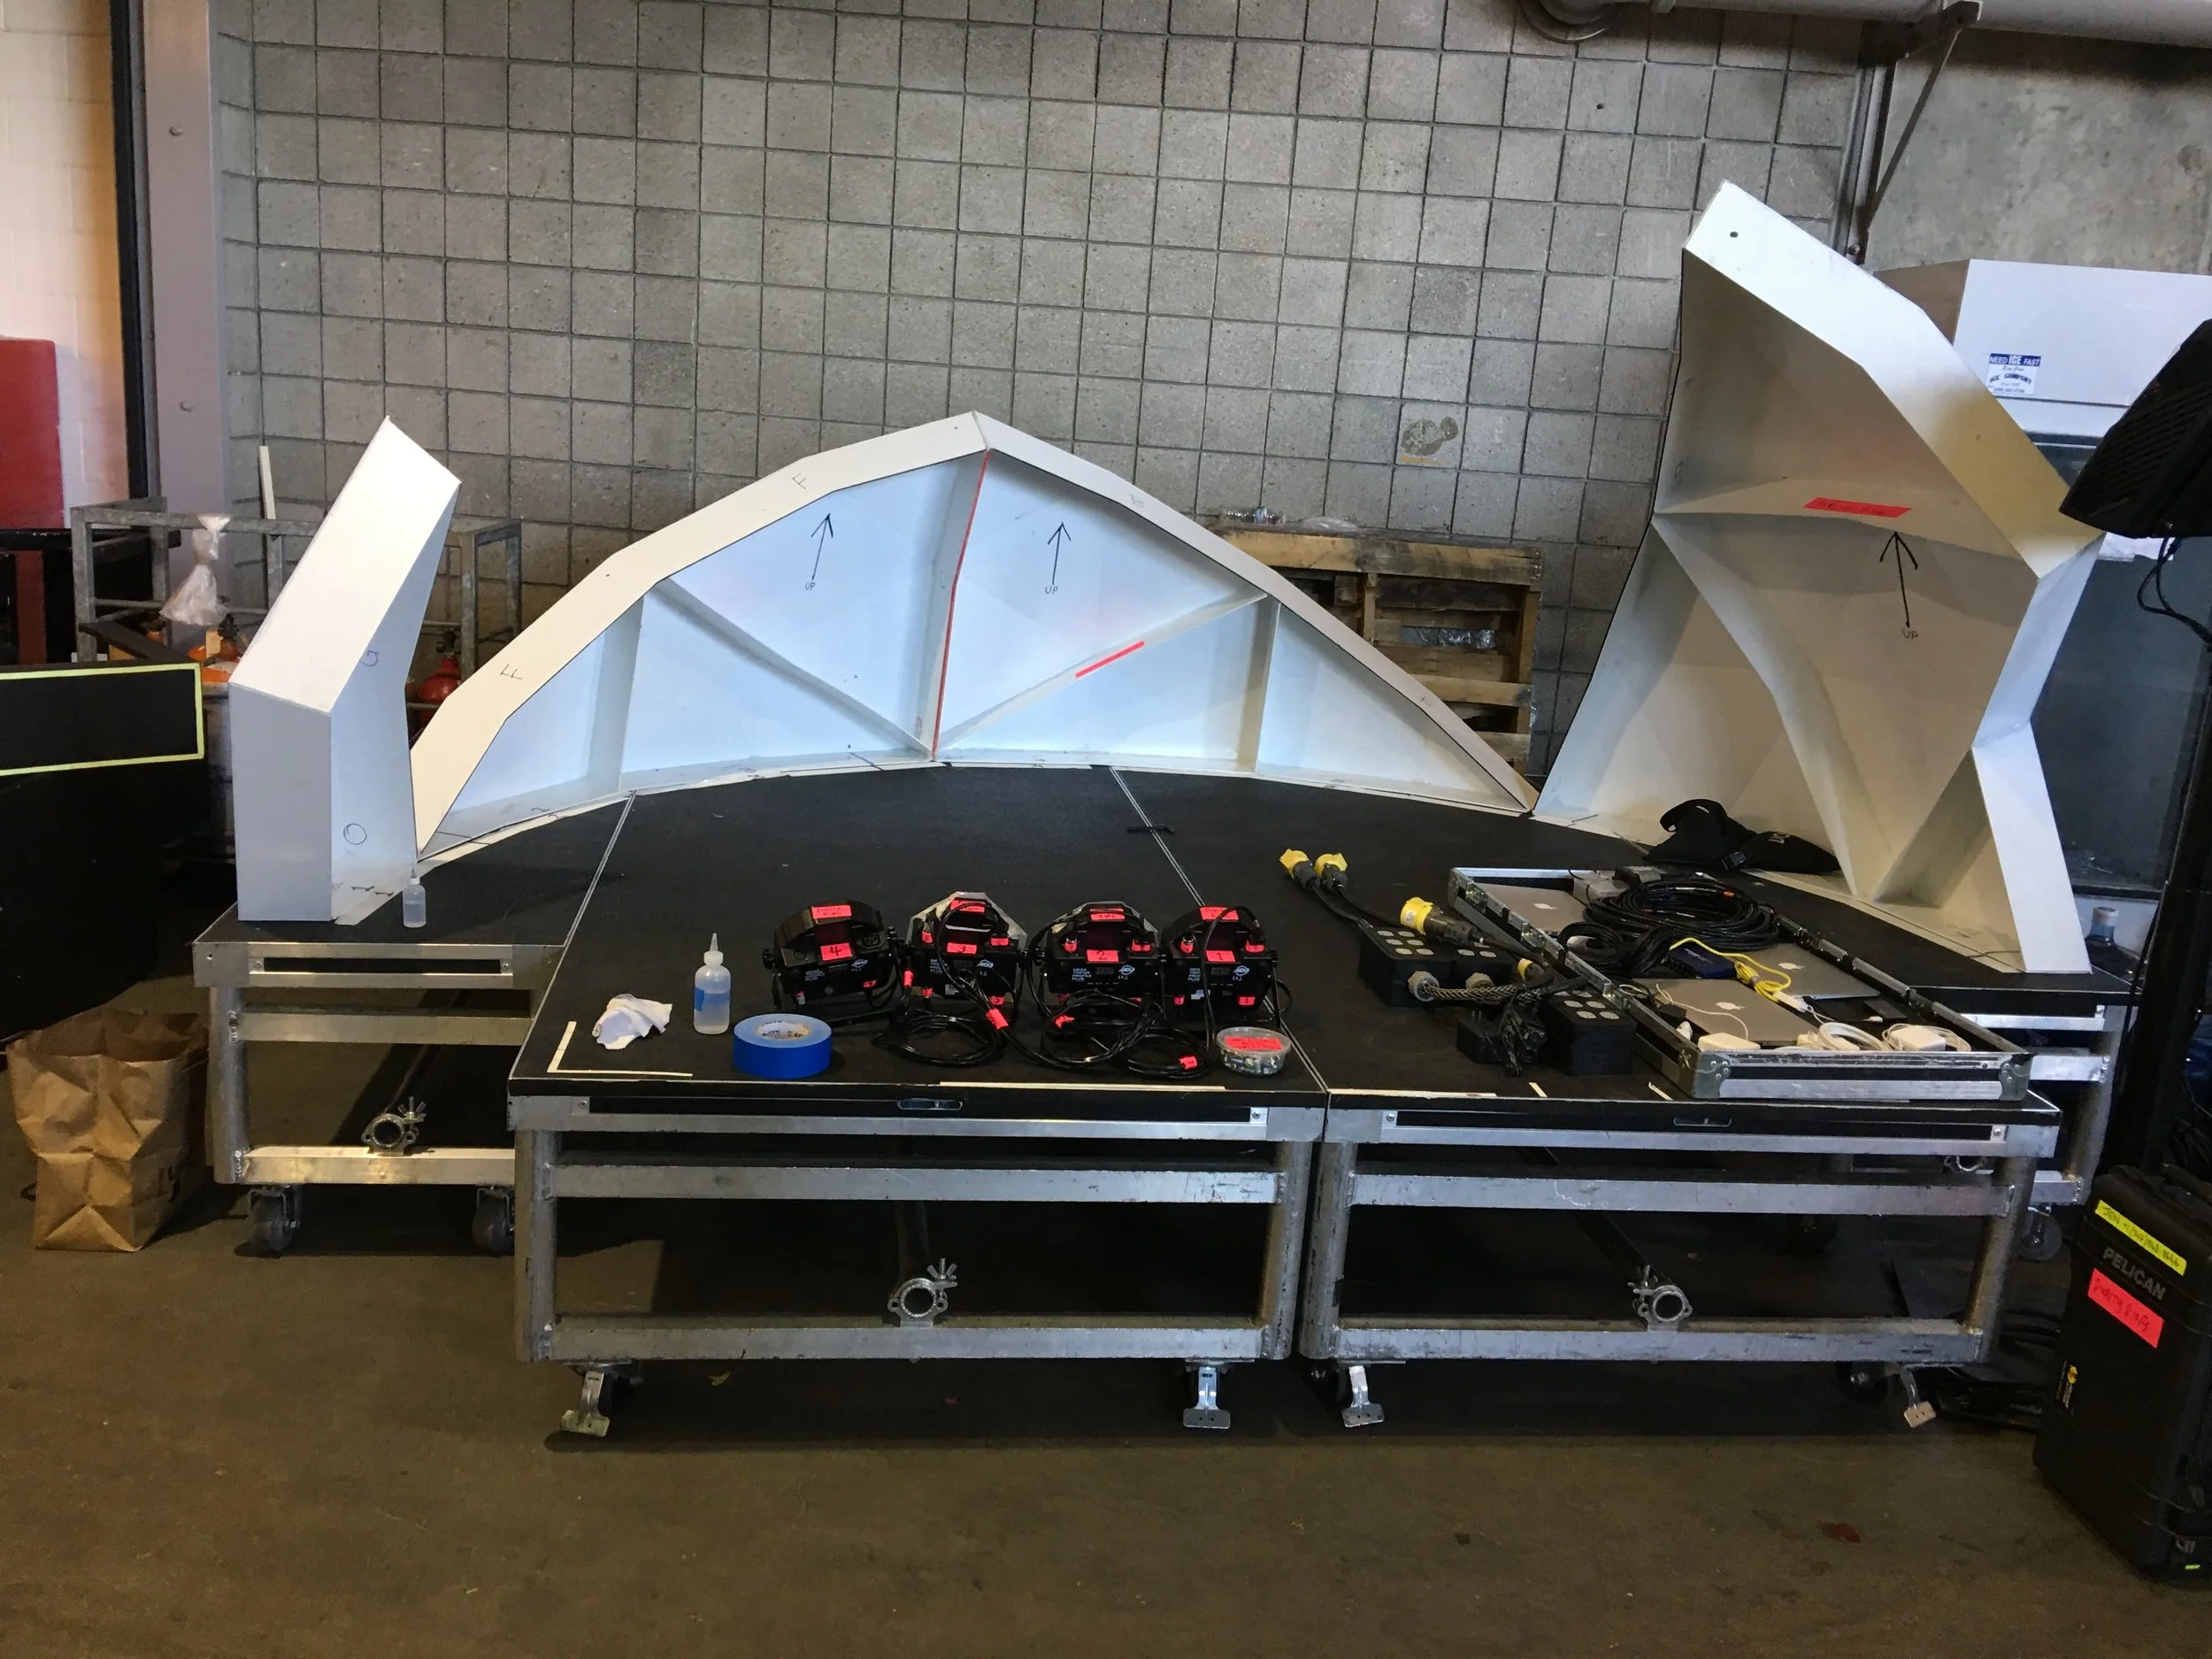
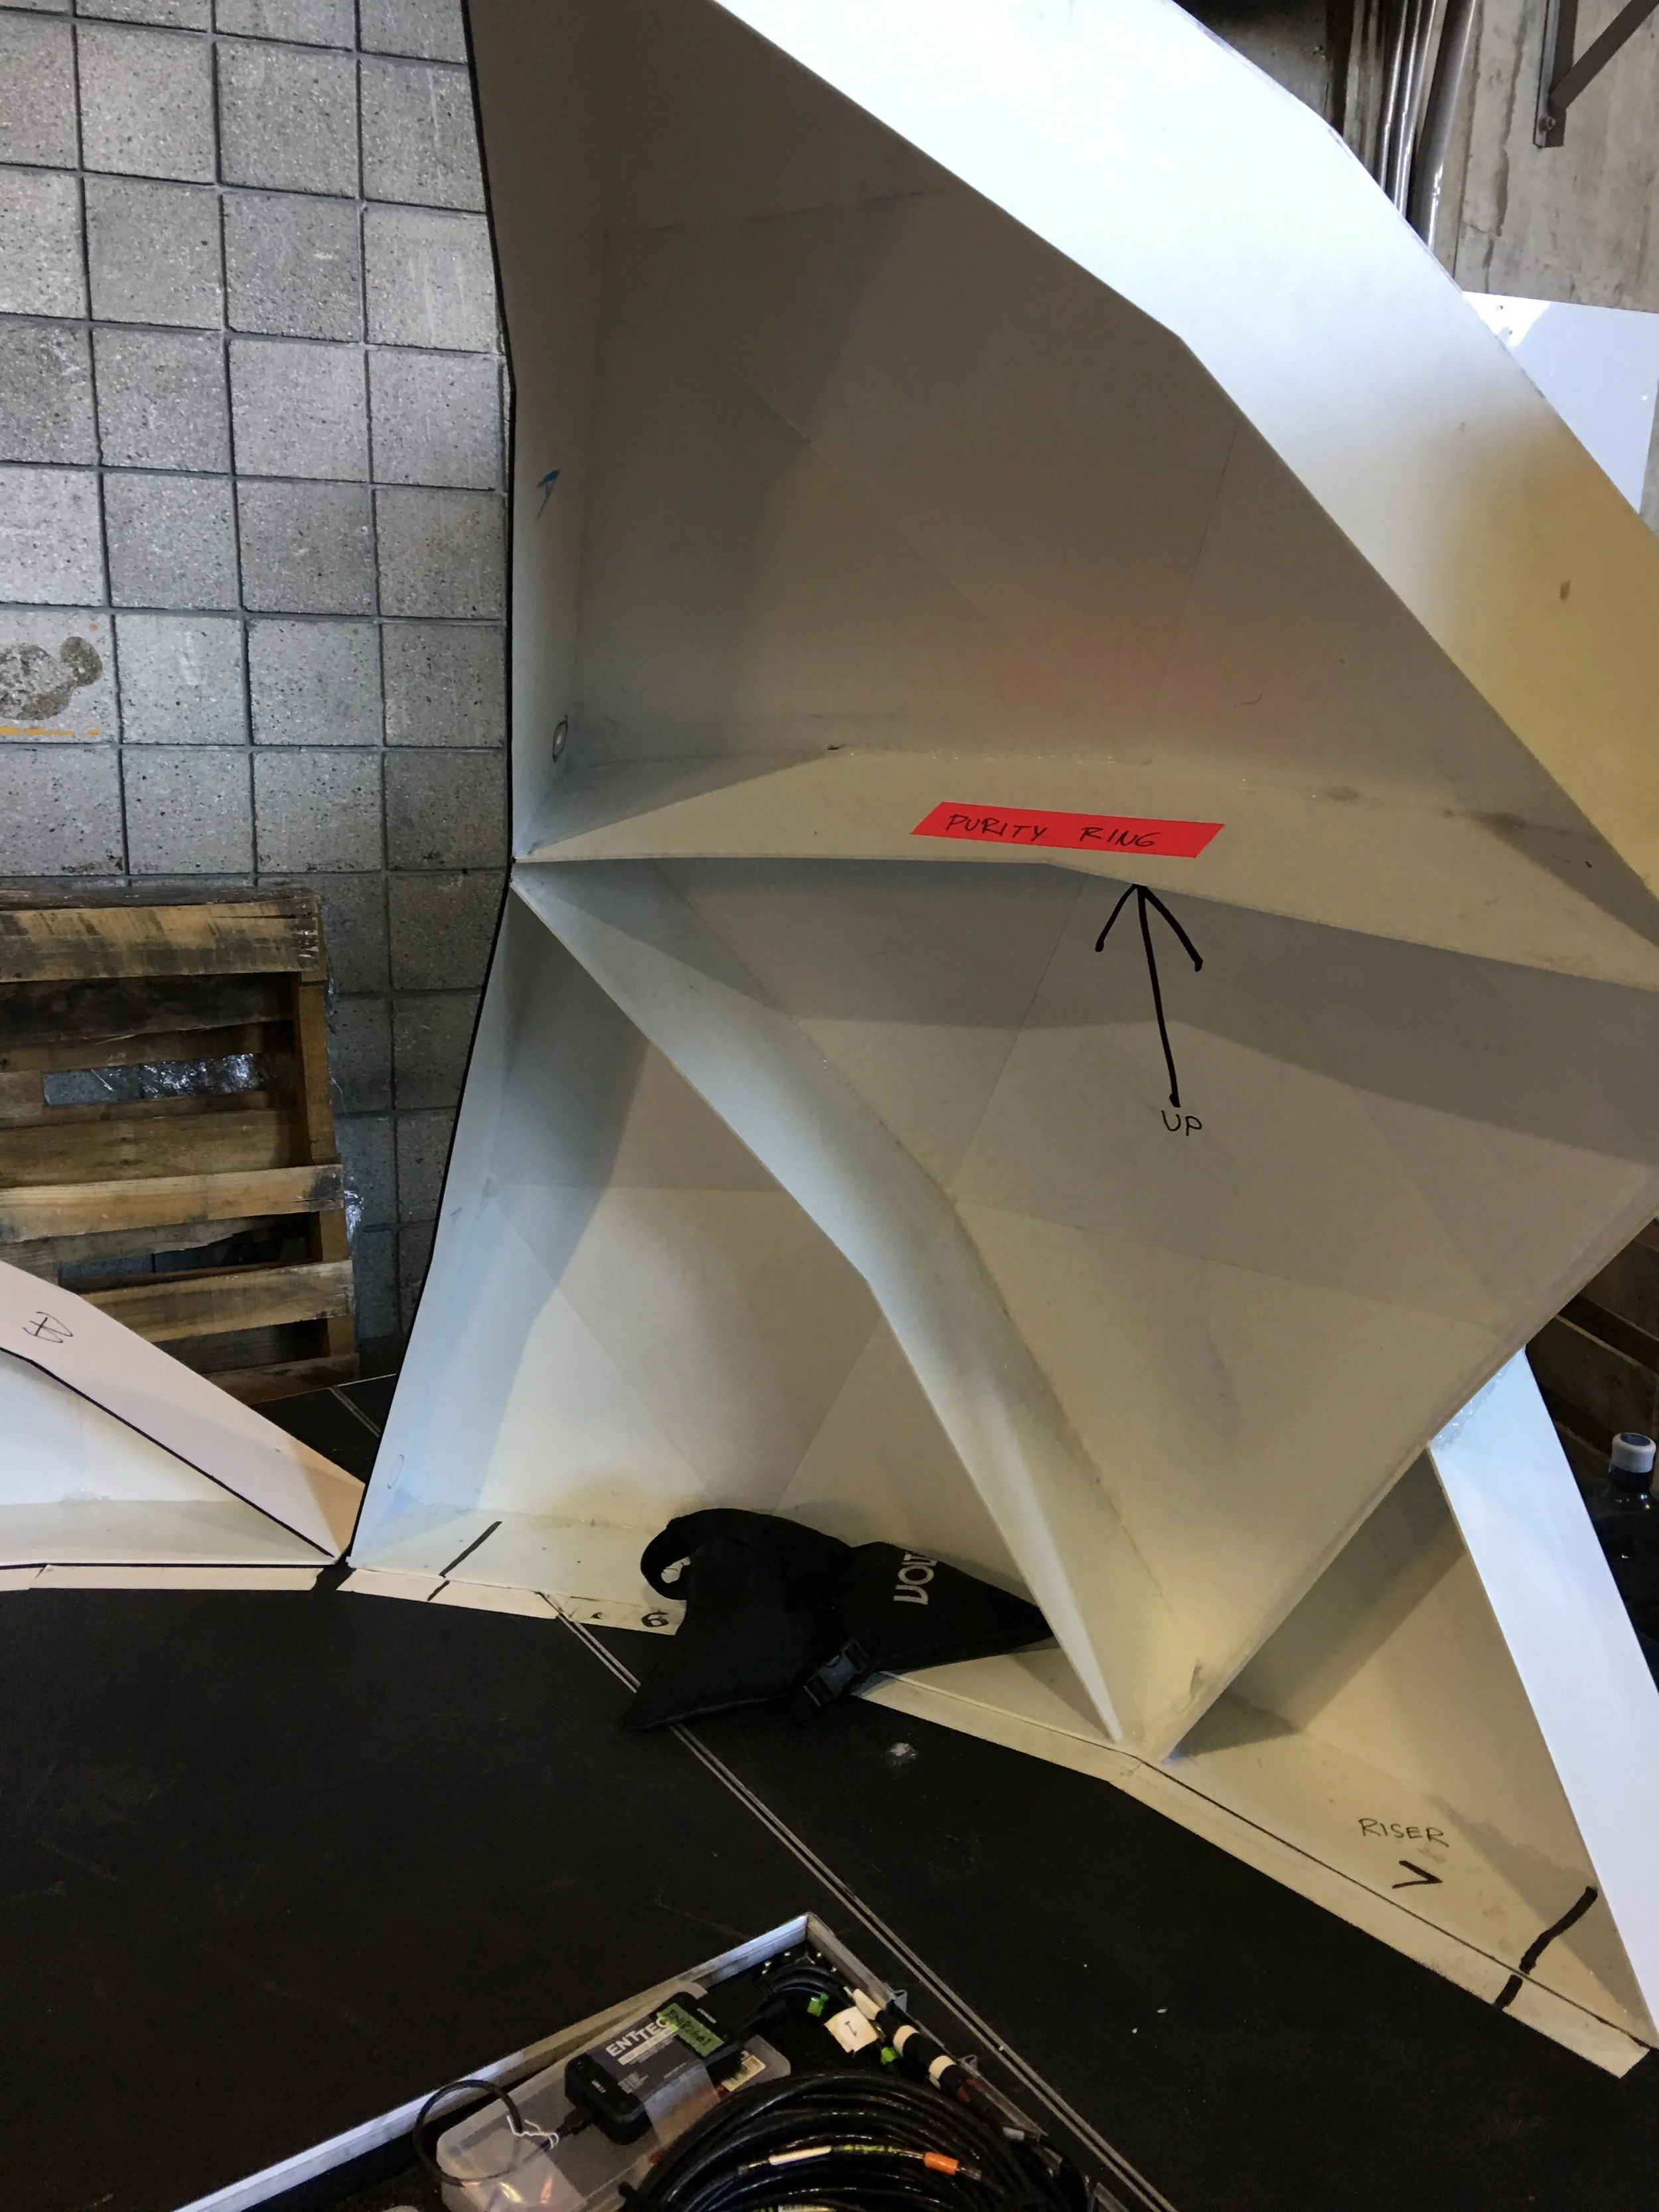
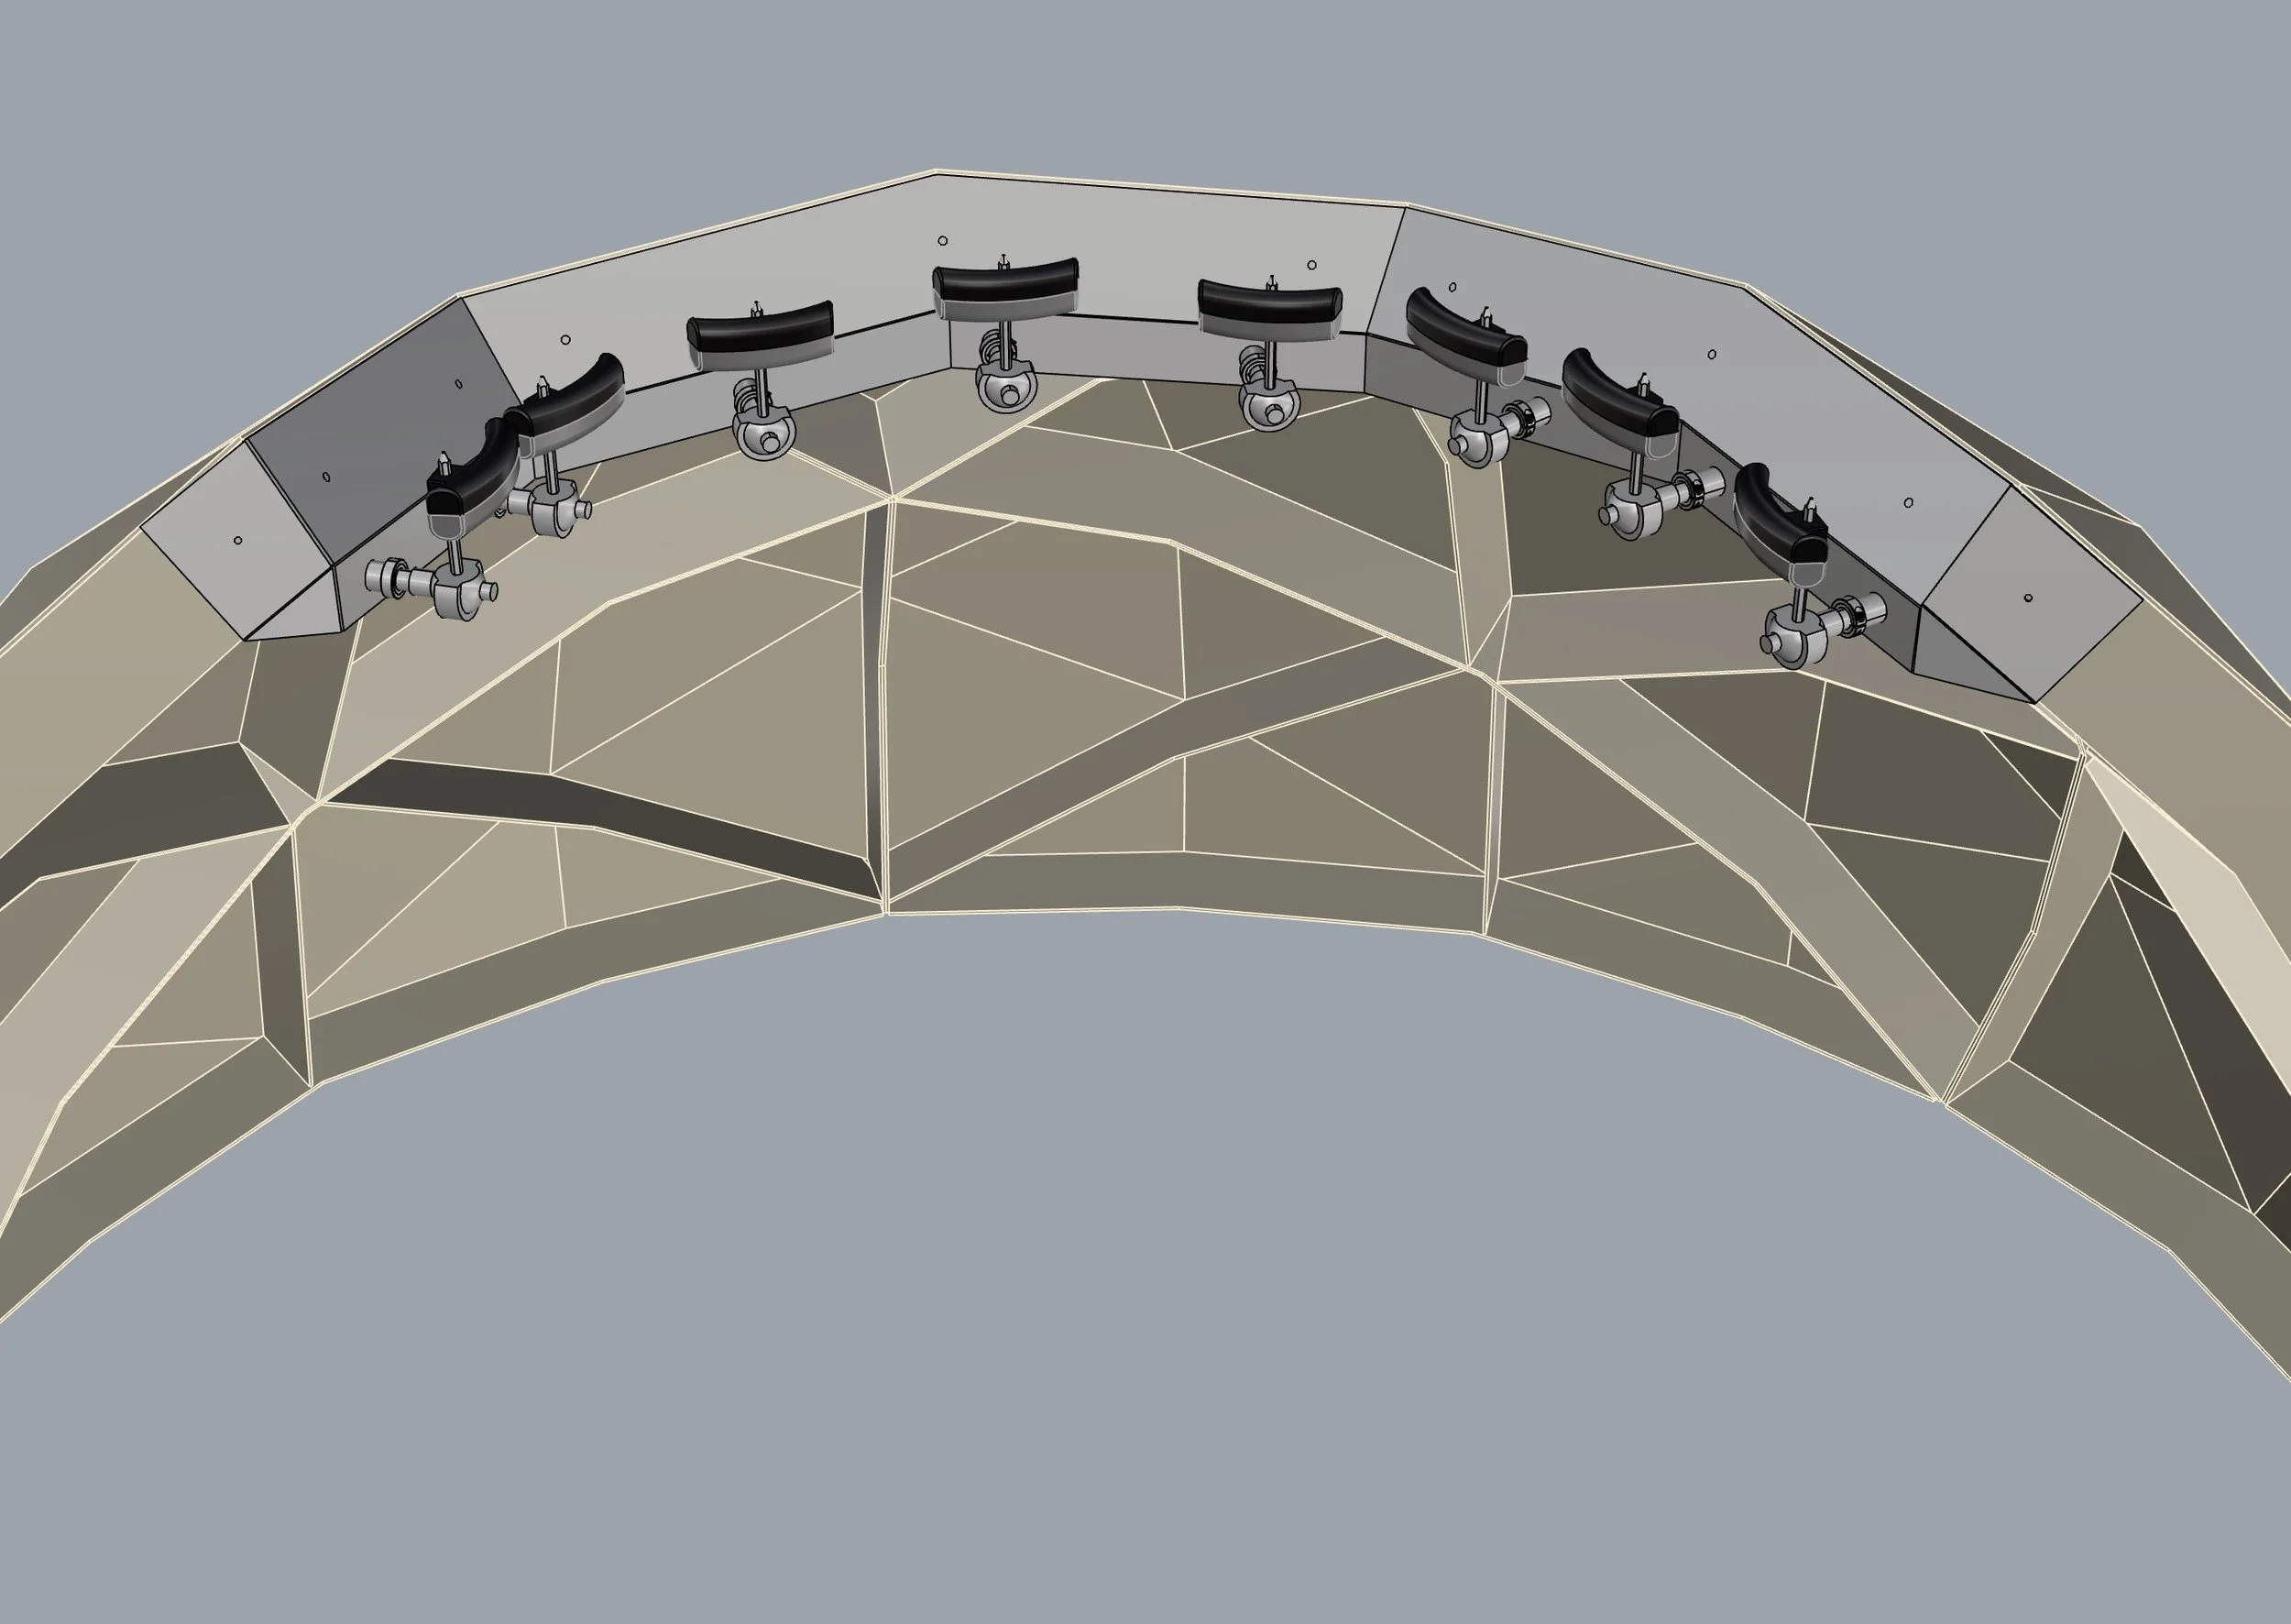
The dome comes apart into seven unique pieces. The ones that say "RISER" with a number 1-7, sit directly on the risers. Line up the number on the dome piece with the number on the white tape. (White tape on risers tends to come loose and should be repaired whenever possible). There are four pieces that sit directly on the riser. The one all the way to the right should be supported with a sand bag as pictured to keep it upright during assembly.
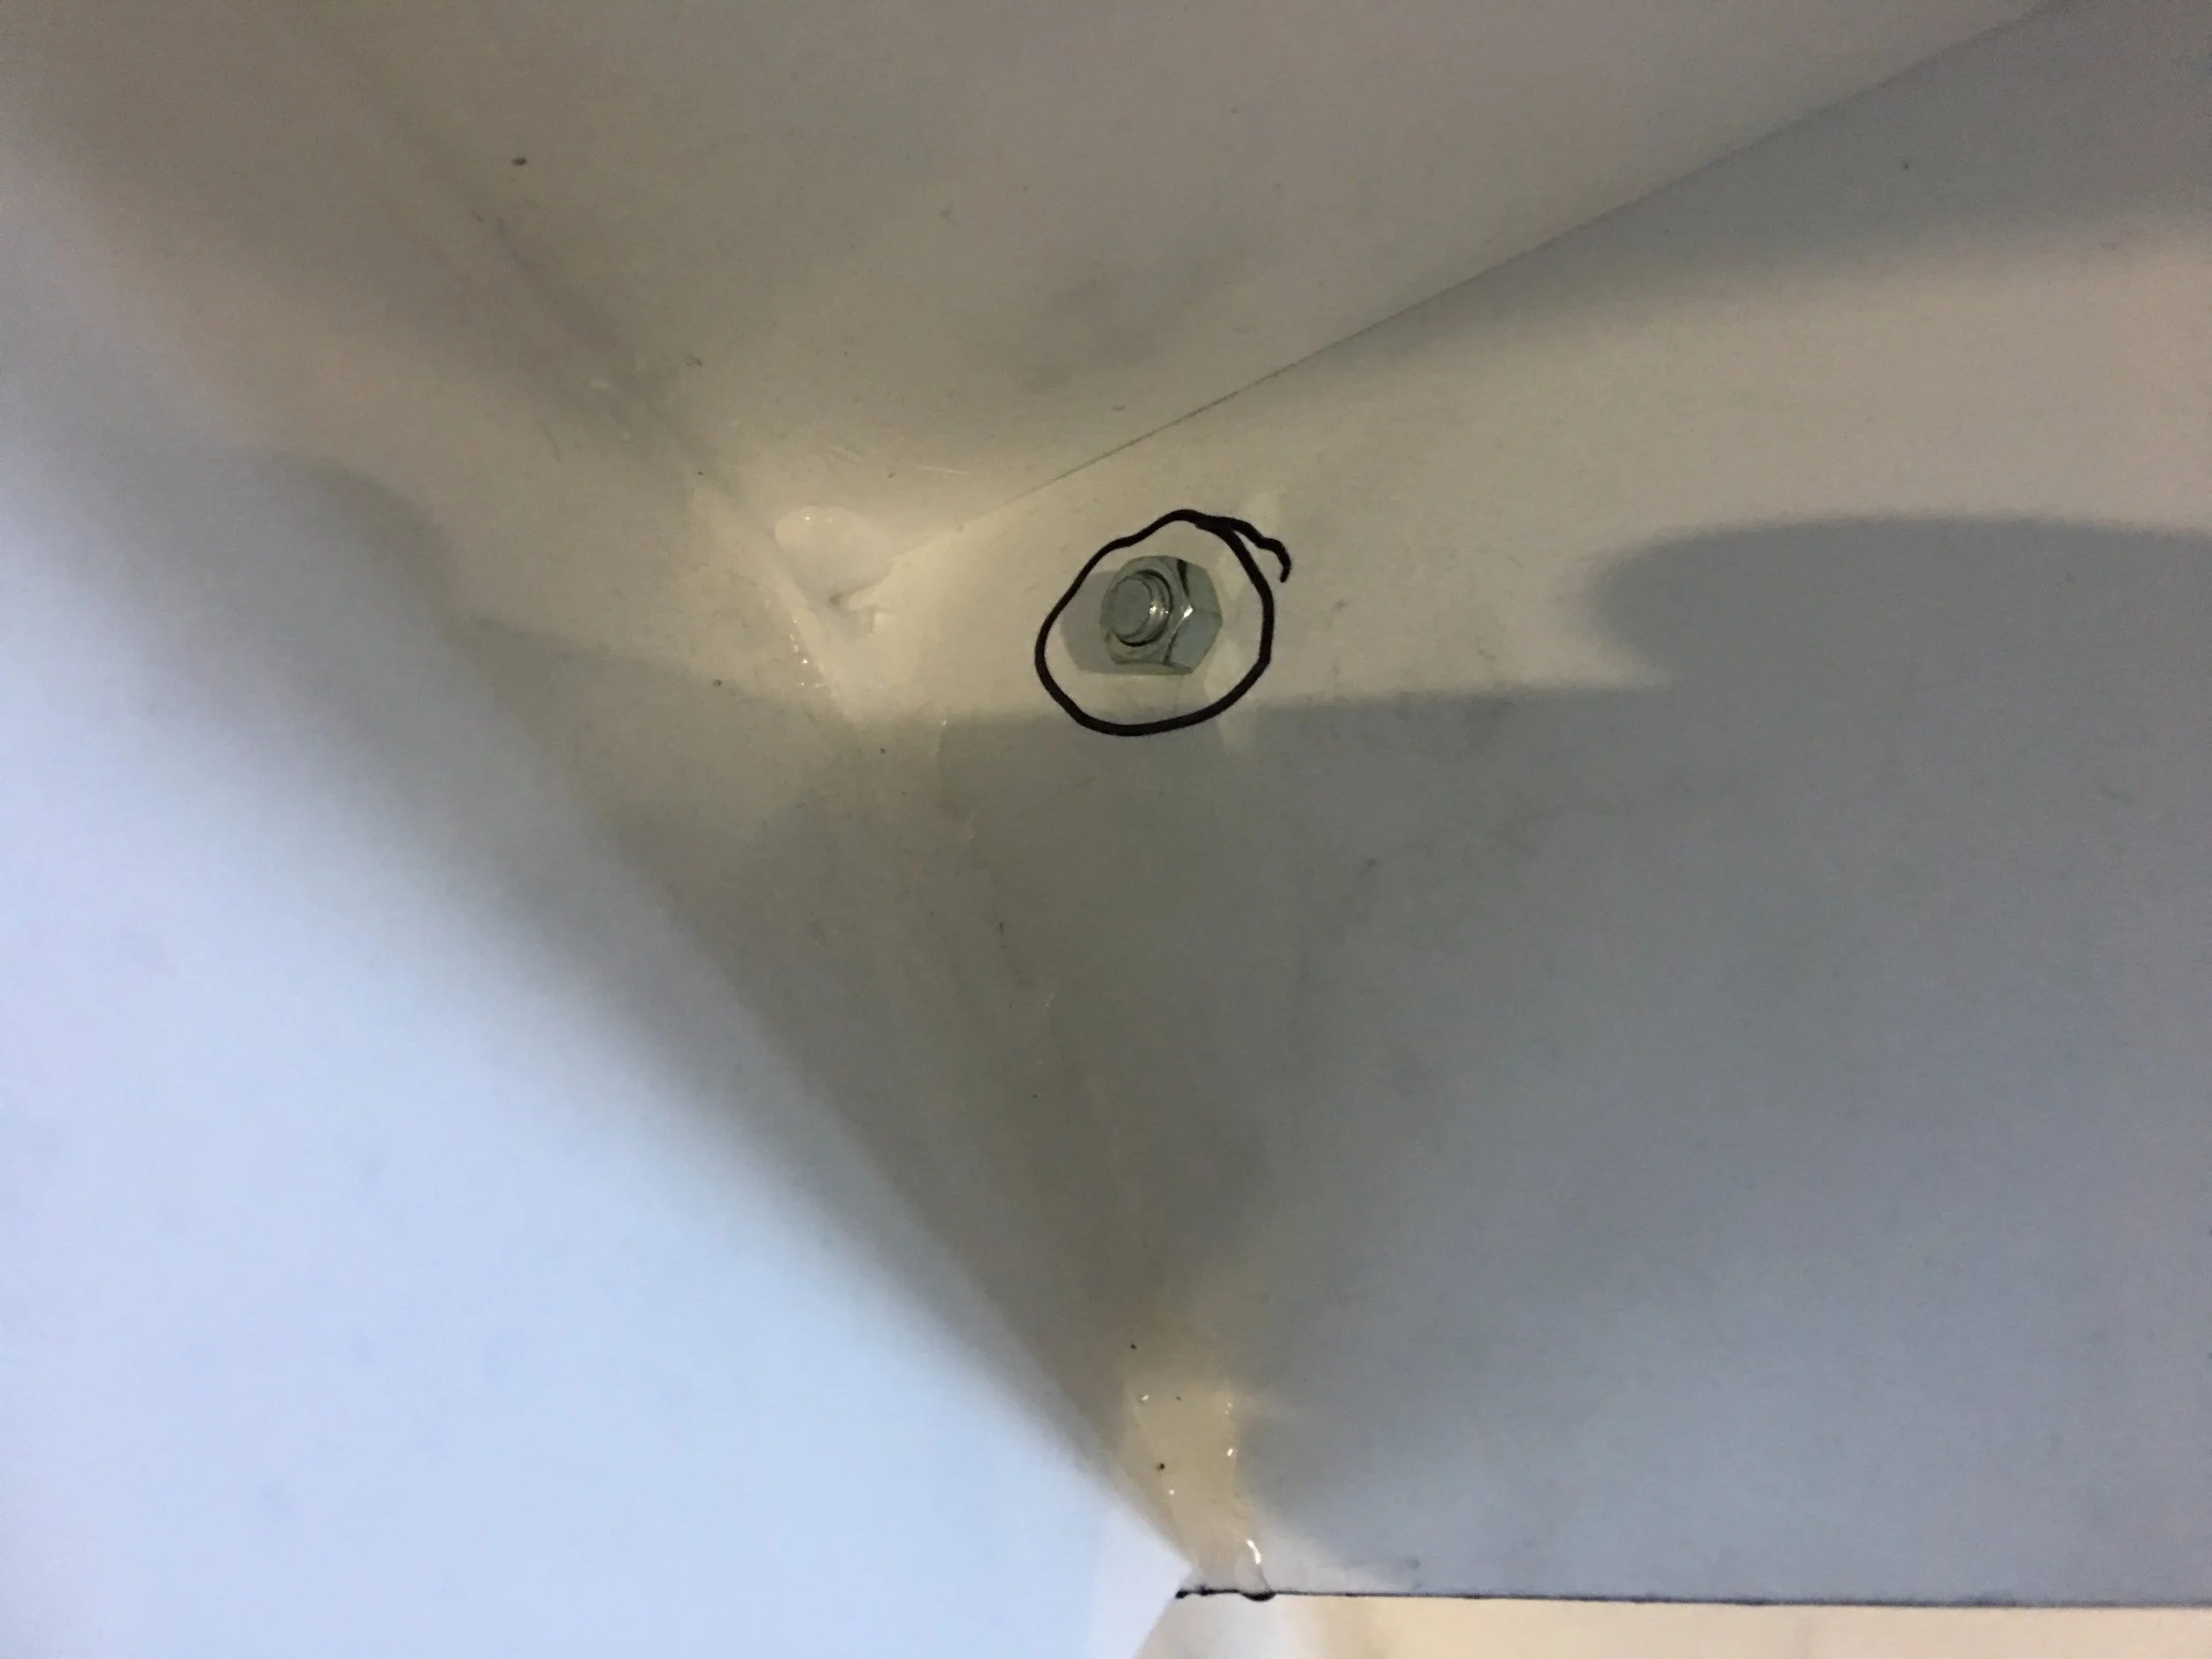
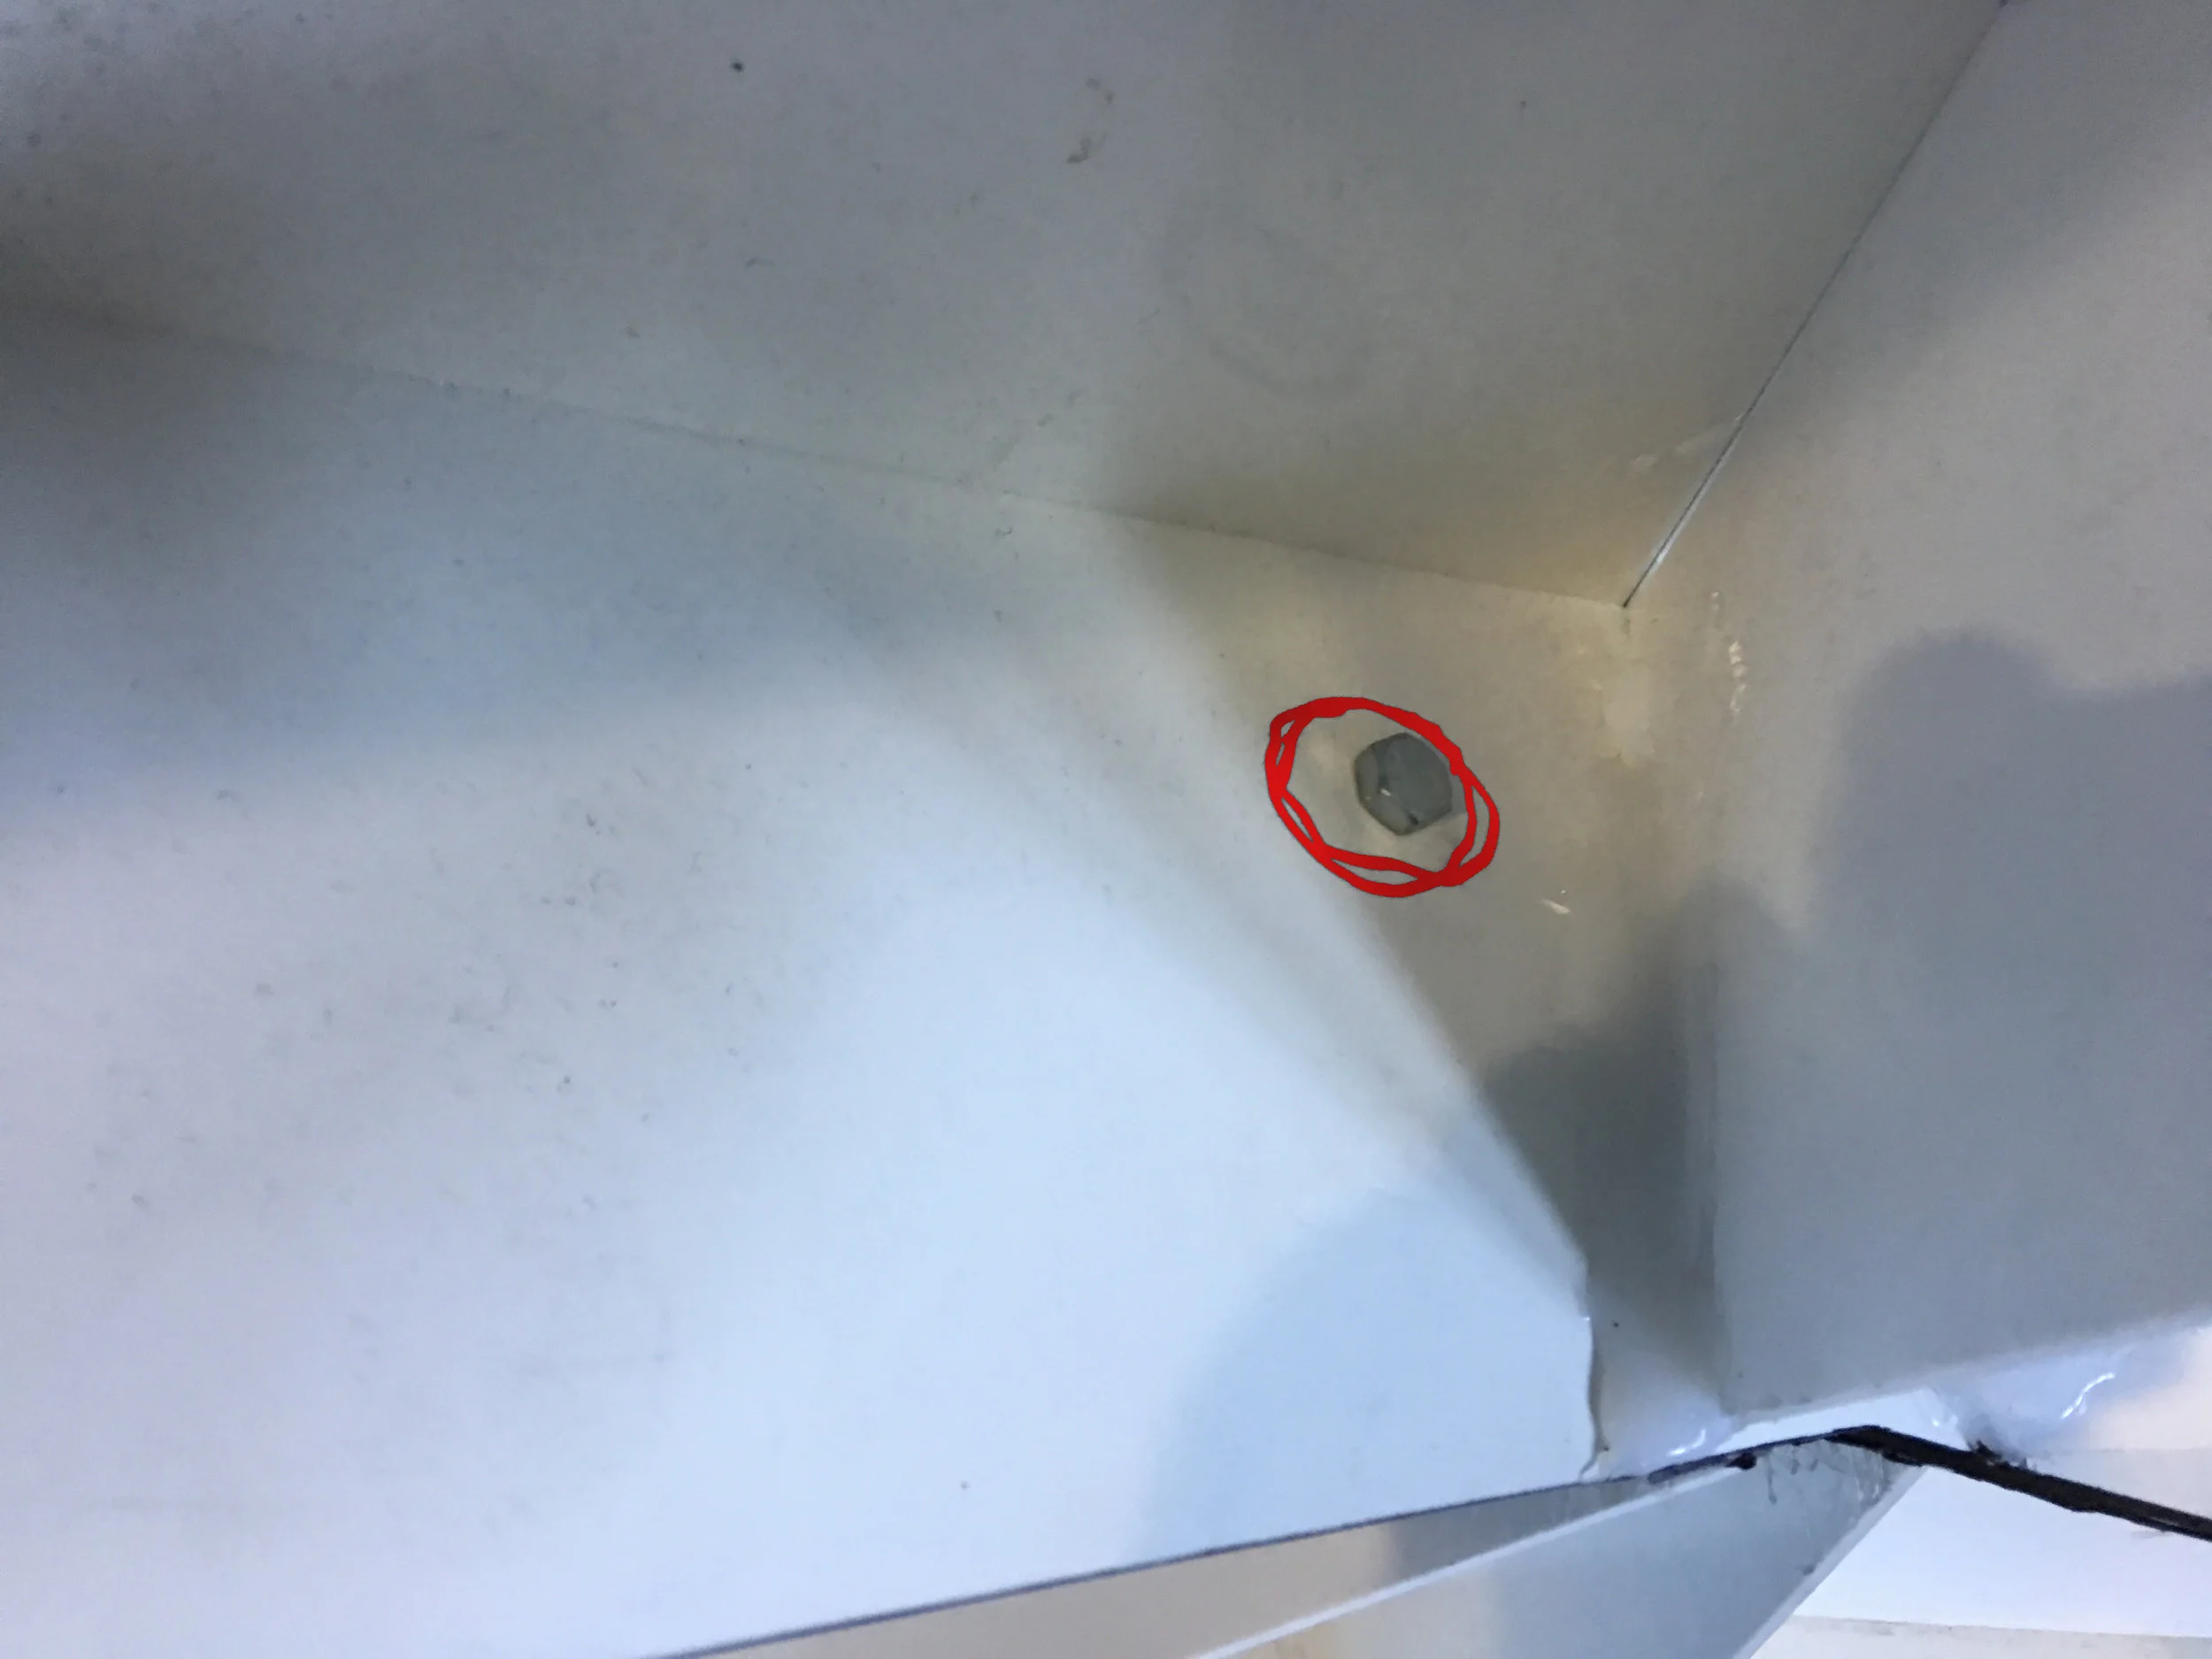
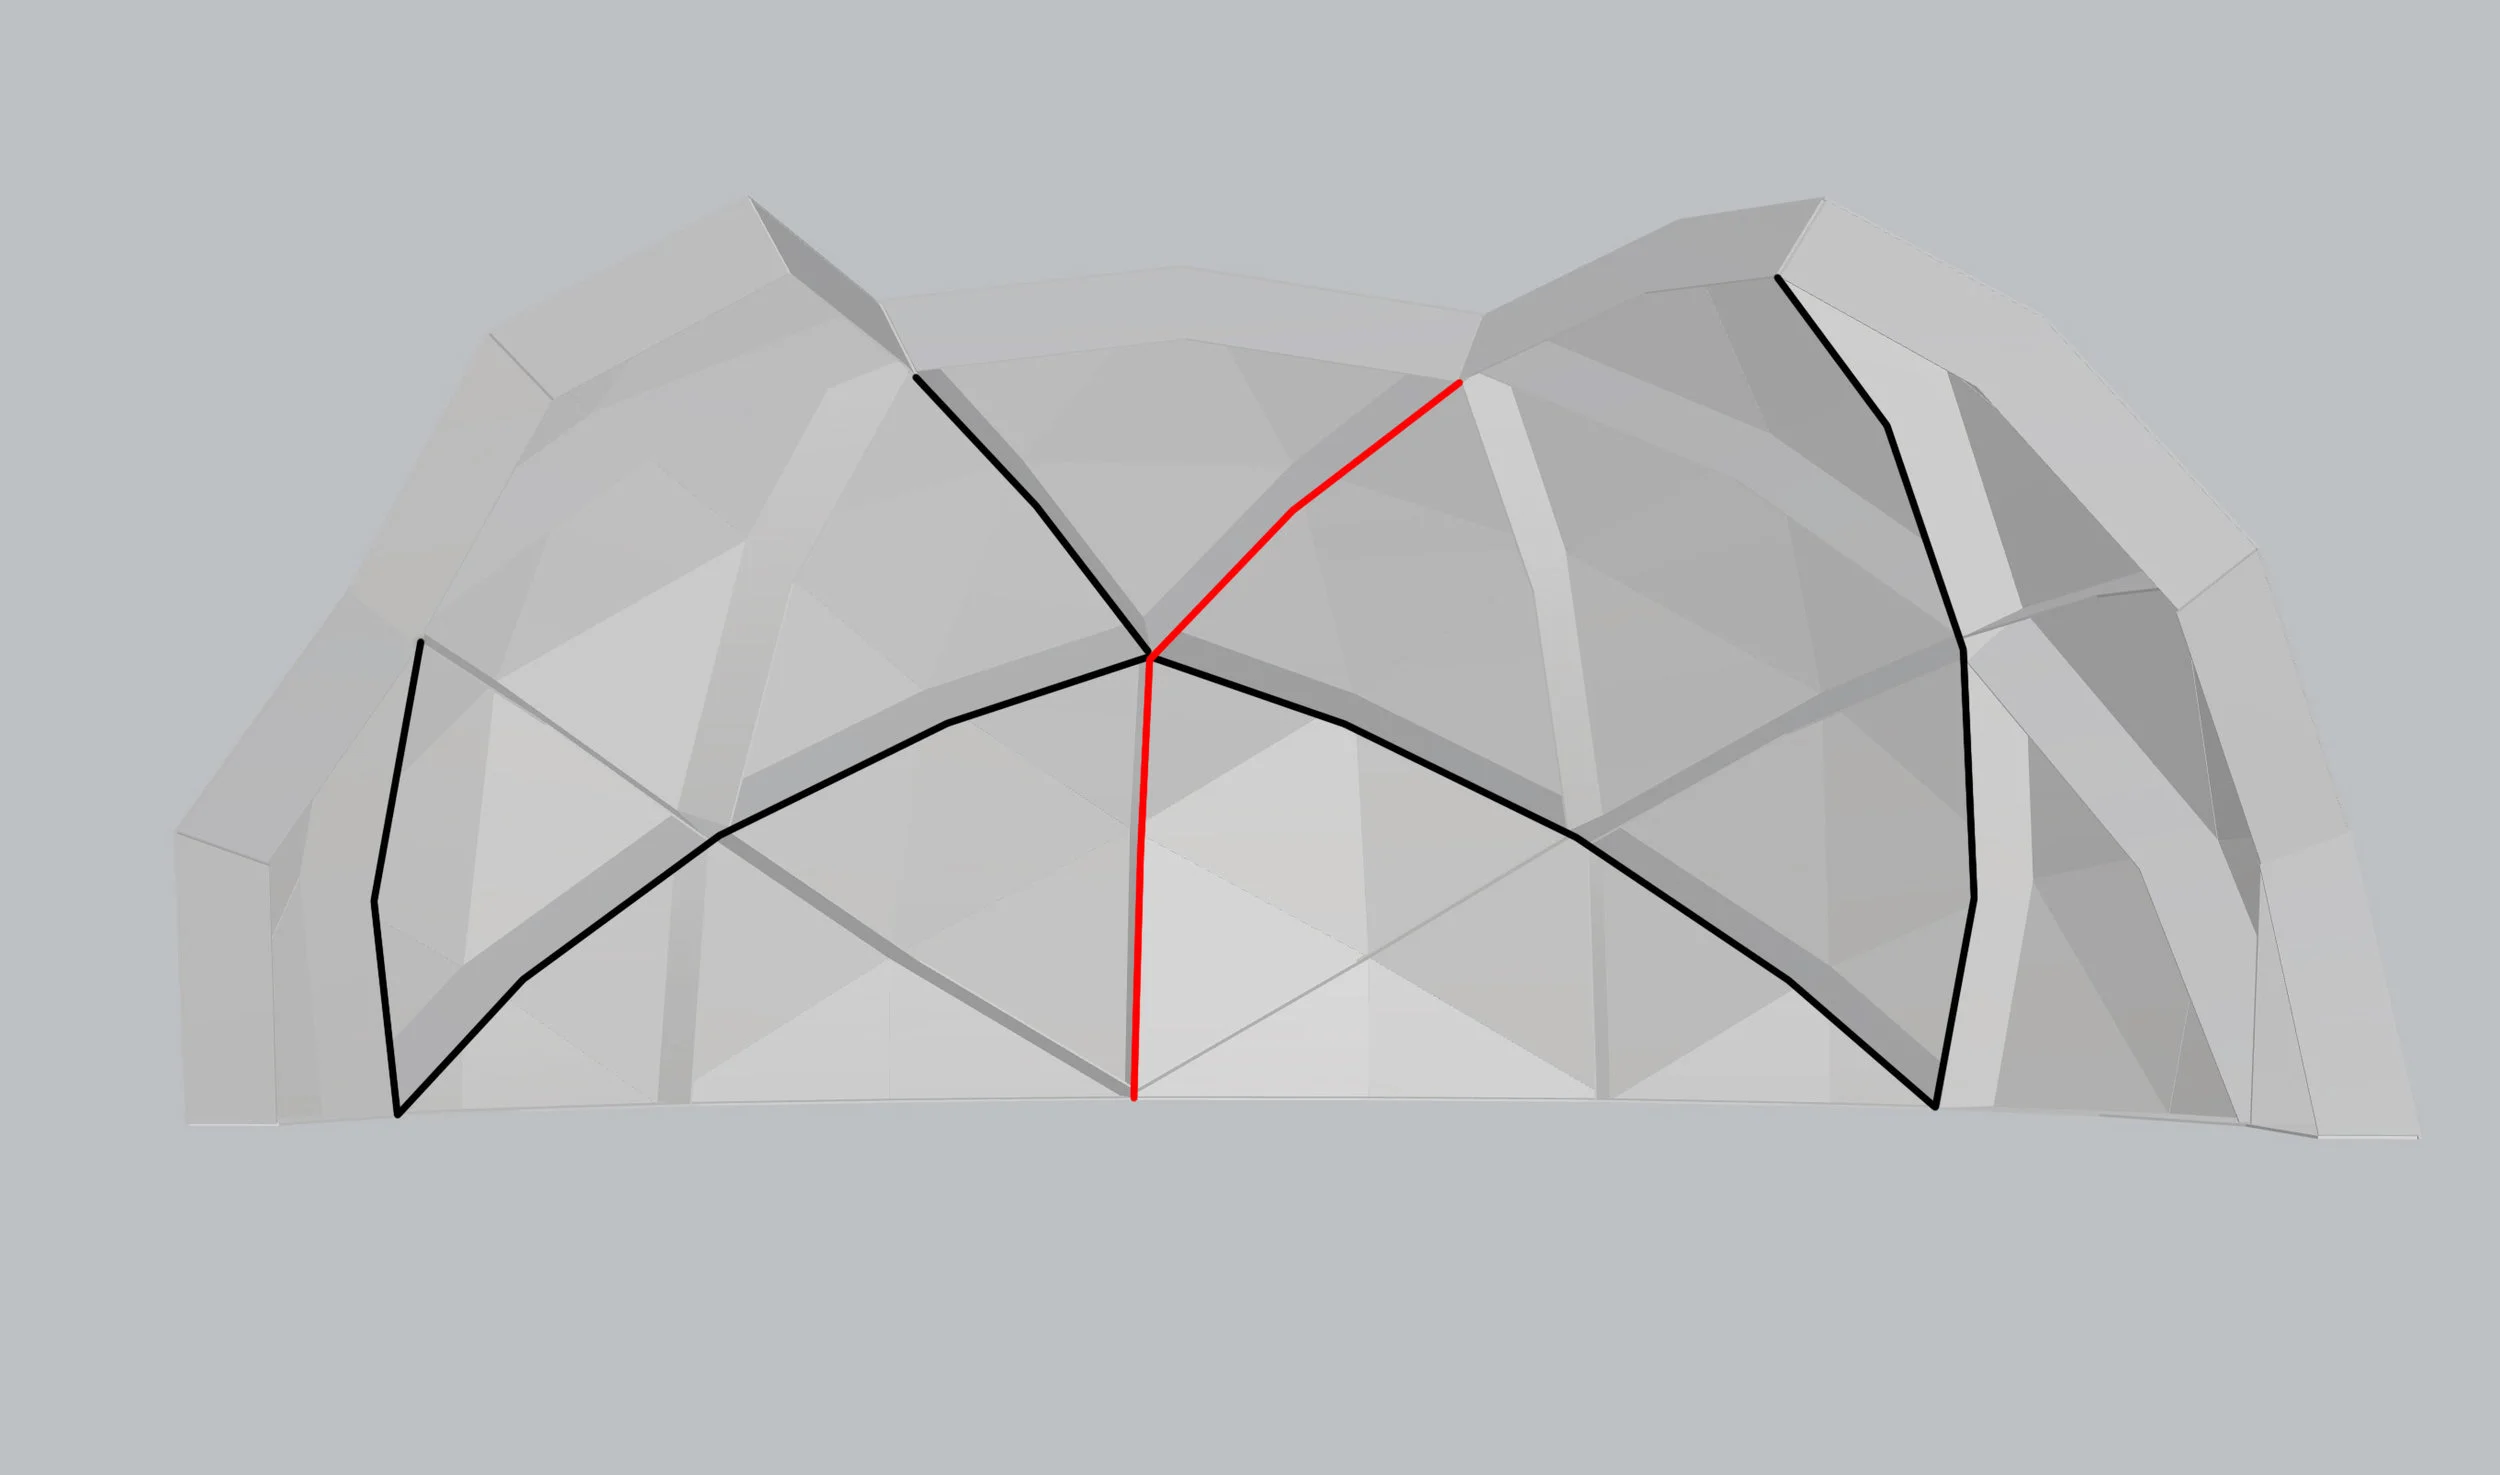
Add the three dome pieces that do not touch the risers by lining up the letters on the sides: "A" matches with "A", "B" with "B", etc... Secure with a nut and bolt, hand tight is sufficient. The holes circled in black should immediately receive a nut and bolt. The holes circled in red should only be bolted once on stage as they hold the two halves of the dome together. Dome pieces are also accordingly outlined in black or red where they meet, red signifying where the dome splits.
Weigh both dome halves down with sand bags. Someone should ride with each dome half as risers are moved on and off stage.
Once on stage, attach the two large risers with a coffin key. Bring the two domes halves together and bolt through holes circled in red. The welded aluminum trigger rack can now be added as pictured. Some force is needed to line up the holes for bolts. NOT ALL HOLES ON THE TRIGGER RACK MUST RECEIVE A BOLT. Roughly every other hole is sufficient.
Once projectors are mounted to their stands, move the base around until the projected content roughly lines up with the dome facets. Use the black dots at every vertex to align projection using software.